平面の鏡面反射
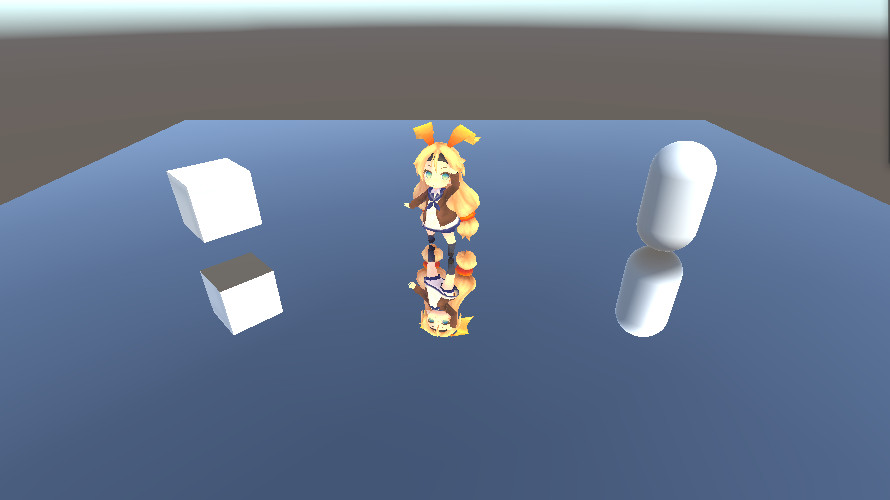
ReflectionProbeを使用する方法
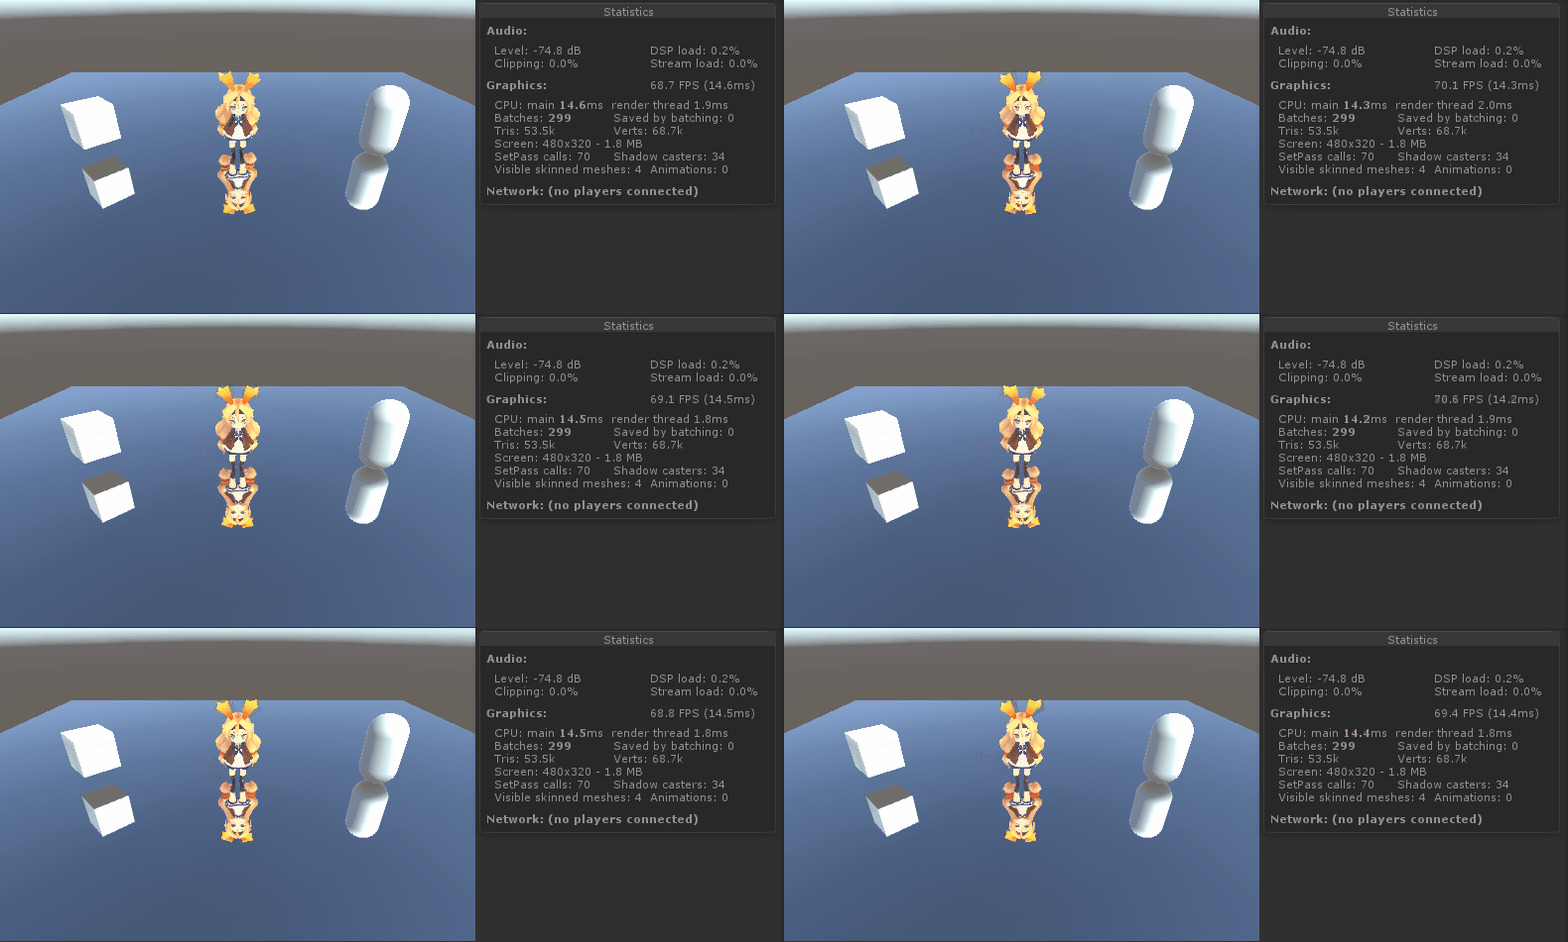
Create→3DObject→Planeより、鏡面用の平面を作成します。新しくMaterialを作成します。このMaterialのShaderをStandardへ、MetallicとSmoothnessを1へ変更します。そして、このMaterialを平面へアタッチします。

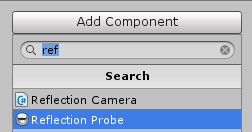
新しく空のゲームオブジェクトを作成し、AddComponentからReflectionProbeをアタッチします。
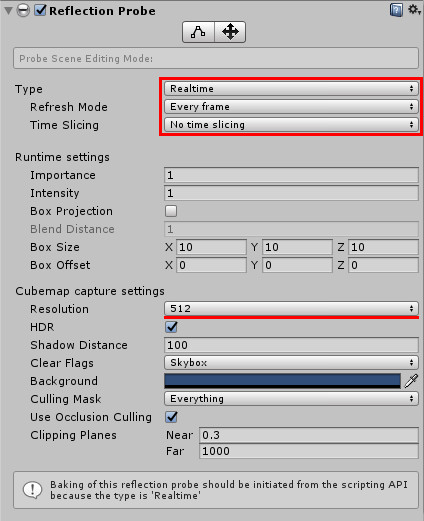
TypeをRealtimeへ変更し、Refresh ModeをEvery frameへTime SlicingをNo time slicingへ変更します。また、CubeMap capture settingのResolutionを512へ変更します。
以下のScriptを作成ます。先ほどのReflectionProbeをアタッチしたゲームオブジェクトに、このScriptをアタッチします。
|
1 2 3 4 5 6 7 8 9 10 11 12 13 14 15 16 17 18 19 20 |
using UnityEngine; using System.Collections; public class ReflectionProbeController : MonoBehaviour { private ReflectionProbe probe; private Transform trfMainCam; void Start() { probe = gameObject.GetComponent<ReflectionProbe>(); trfMainCam = Camera.main.transform; } void Update() { probe.transform.position = new Vector3(trfMainCam.position.x, -trfMainCam.position.y, trfMainCam.position.z); } } |
実行結果
ReflectionProbeを使用しない方法
ここを参考に作成しました。Reflection用のカメラを用意し、そのカメラに映った映像を平面に描画することで、鏡面を作成します。鏡面にしたい平面に以下のShaderを設定したMaterialとScriptをアタッチすると動作します。
ReflectionMatrixに関しては以下のページに詳しく記述されています。
Introduction to 3D Game Programming with DirectX 12 (Computer Science) (2016)
Script
鏡面にしたい平面にこのScirptをアタッチします。このScriptでは平面のレイヤーをMirrorへ変更する必要があります。
|
1 2 3 4 5 6 7 8 9 10 11 12 13 14 15 16 17 18 19 20 21 22 23 24 25 26 27 28 29 30 31 32 33 34 35 36 37 38 39 40 41 42 43 44 45 46 47 48 49 50 51 52 53 54 55 56 57 58 59 60 61 62 63 64 65 66 67 68 69 70 71 72 73 74 75 76 77 78 79 |
using System.Collections; using System.Collections.Generic; using UnityEngine; public class PlaneReflection : MonoBehaviour { private Transform trfMainCamera, trfRefCamera; private RenderTexture refTexture; private GameObject objRefCamera; private Camera mainCamera, refCamera; private Material matRefPalne; // Use this for initialization void Start () { refTexture = new RenderTexture(Screen.width, Screen.height, 0, RenderTextureFormat.ARGB32); mainCamera = Camera.main; trfMainCamera = Camera.main.transform; objRefCamera = new GameObject(); objRefCamera.name = "Reflection Camera"; refCamera = objRefCamera.AddComponent<Camera>(); refCamera.cullingMask &= ~(1 << LayerMask.NameToLayer("Mirror")); trfRefCamera = objRefCamera.transform; refCamera.targetTexture = refTexture; matRefPalne = gameObject.GetComponent<Renderer>().sharedMaterial; matRefPalne.SetTexture("_ReflectionTex", refTexture); } private void SetReflectionCamera() { Vector3 normal = transform.up; Vector3 pos = transform.position; Matrix4x4 mainCamMatrix = mainCamera.worldToCameraMatrix; float d = -Vector3.Dot(normal, pos); Matrix4x4 refMatrix = CalcReflectionMatrix(new Vector4(normal.x, normal.y, normal.z, d)); refCamera.worldToCameraMatrix = mainCamera.worldToCameraMatrix * refMatrix; refCamera.projectionMatrix = mainCamera.projectionMatrix; } private Matrix4x4 CalcReflectionMatrix(Vector4 n) { Matrix4x4 refMatrix = new Matrix4x4(); refMatrix.m00 = 1f - 2f * n.x * n.x; refMatrix.m01 = -2f * n.x * n.y; refMatrix.m02 = -2f * n.x * n.z; refMatrix.m03 = -2f * n.x * n.w; refMatrix.m10 = -2f * n.x * n.y; refMatrix.m11 = 1f - 2f * n.y * n.y; refMatrix.m12 = -2f * n.y * n.z; refMatrix.m13 = -2f * n.y * n.w; refMatrix.m20 = -2f * n.x * n.z; refMatrix.m21 = -2f * n.y * n.z; refMatrix.m22 = 1f - 2f * n.z * n.z; refMatrix.m23 = -2f * n.z * n.w; refMatrix.m30 = 0F; refMatrix.m31 = 0F; refMatrix.m32 = 0F; refMatrix.m33 = 1F; return refMatrix; } void OnWillRenderObject() { SetReflectionCamera(); GL.invertCulling = true; refCamera.Render(); GL.invertCulling = false; matRefPalne.SetTexture("_ReflectionTex", refTexture); } } |
Shader
このShaderを選択したMaterialを平面へアタッチします。ついでにフレネル反射を追加してみました。Flesnelを1にすると完全な鏡面となります。
|
1 2 3 4 5 6 7 8 9 10 11 12 13 14 15 16 17 18 19 20 21 22 23 24 25 26 27 28 29 30 31 32 33 34 35 36 37 38 39 40 41 42 43 44 45 46 47 48 49 50 51 52 53 54 55 56 57 58 59 60 61 62 63 64 65 |
Shader "Unlit/FresnelReflection" { Properties { _MainTex ("Texture", 2D) = "white" {} _ReflectionTex ("ReflectionTexture", 2D) = "white" {} _Flesnel ("Flesnel", Range(0, 1)) = 0.02 } SubShader { Tags { "RenderType"="Transparent" "Queue"="Transparent" } Blend SrcAlpha OneMinusSrcAlpha Pass { CGPROGRAM #pragma vertex vert #pragma fragment frag #include "UnityCG.cginc" struct appdata { float4 vertex : POSITION; float2 uv : TEXCOORD0; float3 normal : NORMAL; }; struct v2f { float2 uv : TEXCOORD0; float4 vertex : SV_POSITION; float4 projCoord : TEXCOORD1; float vdotn : TEXCOORD2; }; sampler2D _MainTex; float4 _MainTex_ST; sampler2D _ReflectionTex; float4 _ReflectionTex_ST; float _Flesnel; v2f vert (appdata v) { v2f o; o.vertex = UnityObjectToClipPos(v.vertex); o.uv = TRANSFORM_TEX(v.uv, _MainTex); o.projCoord = ComputeScreenPos(o.vertex); float3 viewDir = normalize(ObjSpaceViewDir(v.vertex)); o.vdotn = dot(viewDir, v.normal.xyz); return o; } fixed4 frag (v2f i) : SV_Target { fixed4 col = tex2Dproj(_ReflectionTex, UNITY_PROJ_COORD(i.projCoord)); col.a = saturate(_Flesnel + (1 - _Flesnel) * pow(1 - i.vdotn, 5)); return col; } ENDCG } } } |
実行結果
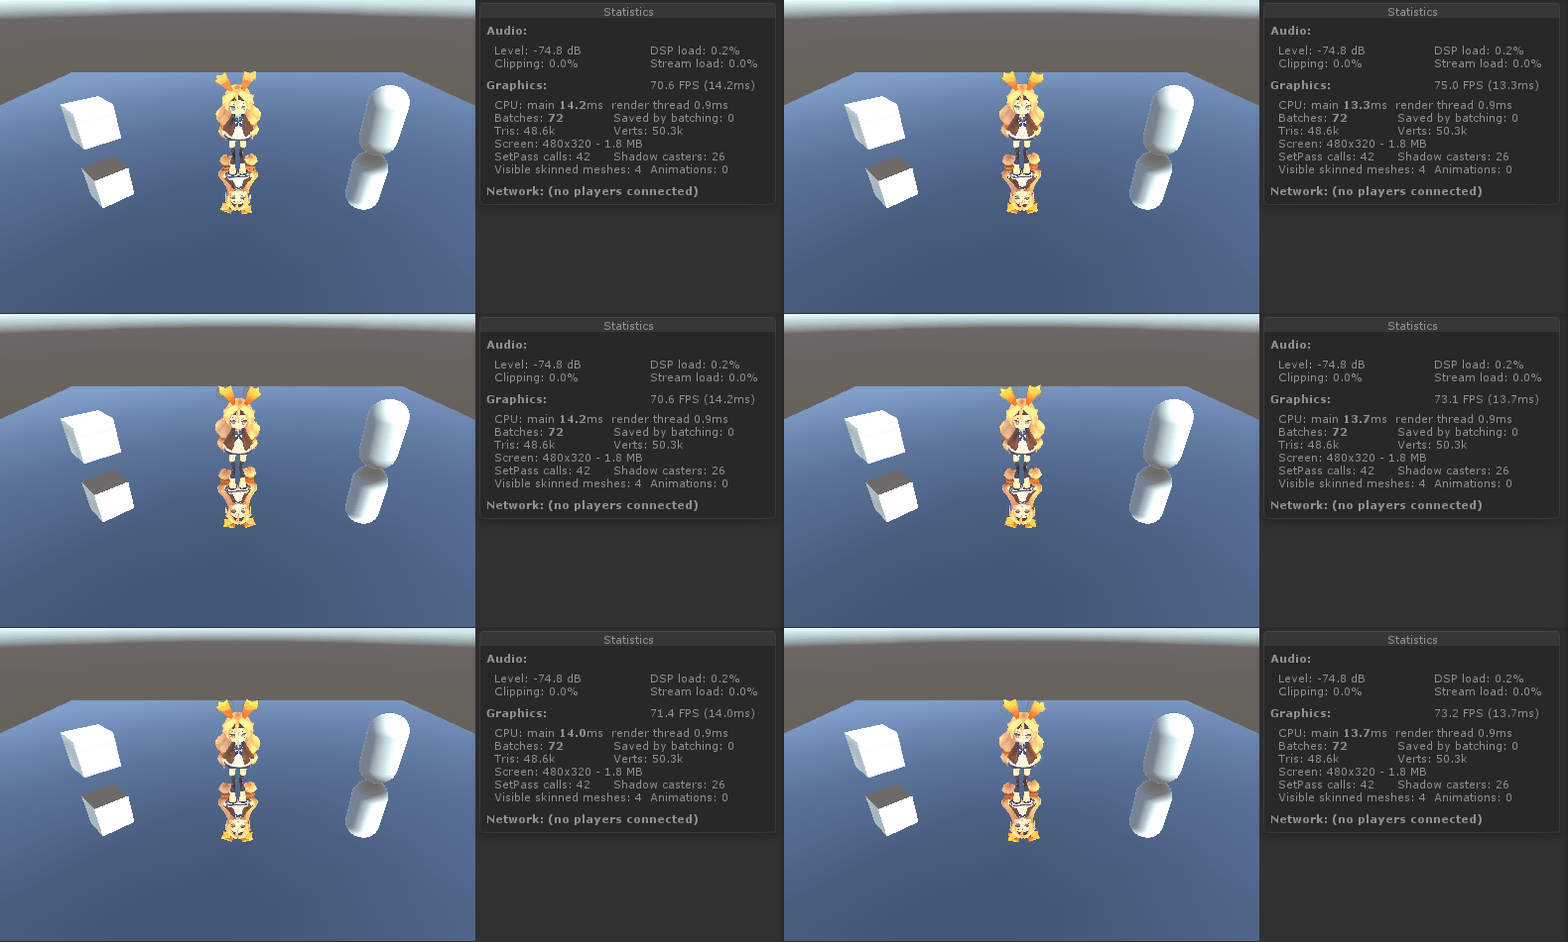
実行すると、このように平面が鏡面になります。ReflectionProbeを使用した場合より、動作が軽いことがわかります。
Scriptの改良
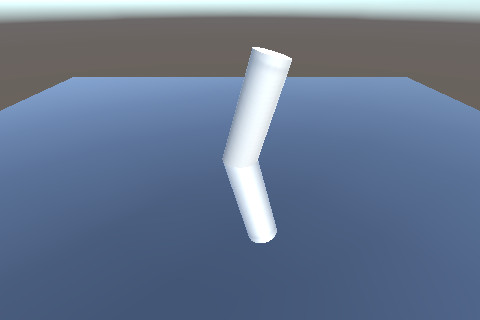
鏡面ができた、と思いきや一つ問題があります。それは、以下の画像のように、平面に円柱を差し込んだ状態で実行すると
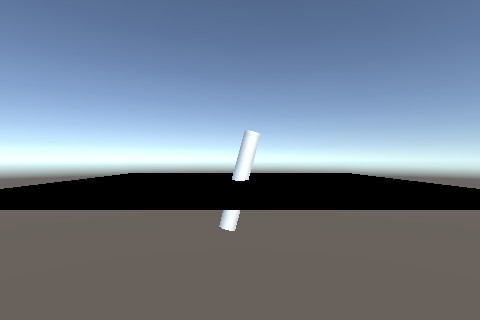
このように、平面より下の部分もカメラに映るため、鏡面に映ってはいけないものが映ってしまいます。
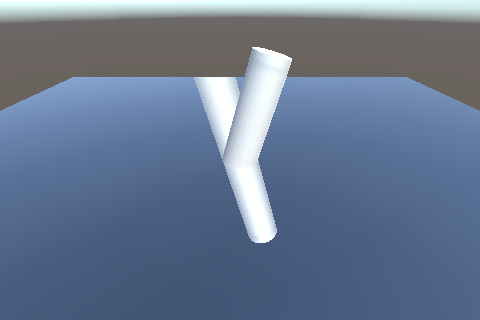
解決方法
CalculateObliqueMatrixにクリップ平面とみなすVector4を渡し、得られたMatrixをカメラのProjectionMatrixに代入します。すると、カメラと指定した平面の間を描画対象から外すことができるようです。クリップ平面とみなすVector4は、以下の平面の方程式内にある\((a,b,c,d)\)です。
$$
\begin{align}
&ax+by+cz+d=0\\
&d=-\vec{n}\cdot\vec{p}
\end{align}
$$
\(\vec{n}\)は平面の法線、また、\((a,b,c)\)は平面の法線を表しているので\(\vec{n}=(a,b,c)\)です。そして、\(\vec{p}=(x_{o}, y_{o}, z_{o})\)であり、\((x_{o}, y_{o}, z_{o})\)は平面上の任意の座標です。
Script
上記をもとに、Scriptを変更しました。
|
1 2 3 4 5 6 7 8 9 10 11 12 13 14 15 16 17 18 19 20 21 22 23 24 |
private void SetReflectionCamera() { //Vector3 normal = Vector3.up; Vector3 normal = transform.up; Vector3 pos = transform.position; Matrix4x4 mainCamMatrix = mainCamera.worldToCameraMatrix; float d = -Vector3.Dot(normal, pos); Matrix4x4 refMatrix = CalcReflectionMatrix(new Vector4(normal.x, normal.y, normal.z, d)); refCamera.worldToCameraMatrix = mainCamera.worldToCameraMatrix * refMatrix; Vector3 cpos = refCamera.worldToCameraMatrix.MultiplyPoint(pos); //↑と同じ //Vector3 cpos = refCamera.worldToCameraMatrix * new Vector4(pos.x, pos.y, pos.z, 1.0f); Vector3 cnormal = refCamera.worldToCameraMatrix.MultiplyVector(normal).normalized; //↑と同じ //Vector3 cnormal = refCamera.worldToCameraMatrix * new Vector4(normal.x, normal.y, normal.z, 1.0f) - refCamera.worldToCameraMatrix * new Vector4(0, 0, 0, 1.0f); Vector4 clipPlane = new Vector4(cnormal.x, cnormal.y, cnormal.z, -Vector3.Dot(cpos, cnormal)); refCamera.projectionMatrix = mainCamera.CalculateObliqueMatrix(clipPlane); } |
実行結果
参考ページ
Combined Reflections: Stereo Reflections in VR
Introduction to 3D Game Programming with DirectX 12 (Computer Science) (2016)
UnityでVR対応のどこでもドア実現を目指す その2 Oblique Near-Plane Clipping編
-
前の記事
Textureを合成するShader 2018.10.08
-
次の記事
波動方程式を用いた波紋の作成(2019/11/09修正) 2018.10.27


コメントを書く