HP残量によって色が変化するHPゲージ
Color.Lerpを使用する方法
二色を使用したゲージ
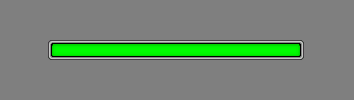
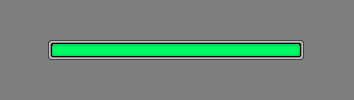
以下の白いHPゲージと背景画像を使用し、作成します。
![]()
![]()
Create→UI→Imageから背景用とゲージ用のImageを作成し、上画像をSource Imageへ設定します。
Script
以下のScriptを作成し、ゲージ用のImageへアッタッチします。Color.LerpによってHP残量に応じた色を求めています。この求めた色をImageのColorへ渡すことでゲージの色を変えています。
using System.Collections;
using System.Collections.Generic;
using UnityEngine;
using UnityEngine.UI;

public class HPGaugeColorChange : MonoBehaviour
{

    public Color color_1, color_2;
    public float maxHP = 100;
    [Range(0, 100)]  public float hp = 100;
    private Image image_HPgauge;
    private float hp_ratio;

    // Start is called before the first frame update
    void Start()
    {
        image_HPgauge = gameObject.GetComponent();
    }

    // Update is called once per frame
    void Update()
    {
        hp_ratio = hp / maxHP;

        image_HPgauge.color = Color.Lerp(color_2, color_1, hp_ratio);
        image_HPgauge.fillAmount = hp_ratio;
    }
}
実行結果
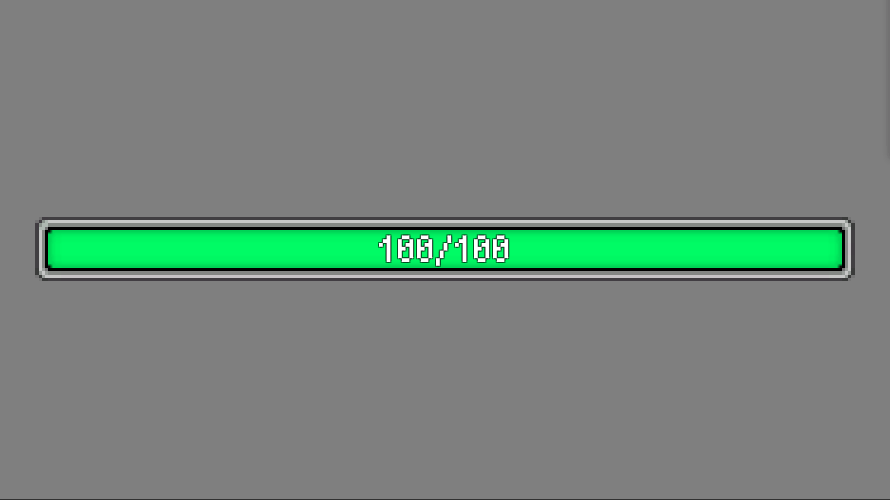
実行結果は以下の通りです。color_1にrgba(0,255,0,255)をcolor_2にrgba(255,0,0.255)を設定しています。HP残量によってゲージの色が変化することがわかります。ただ、補間によって求められている色はあまりきれいではありません。
四色を使用したゲージ
先ほどの二色を使用した補間ではきれいに色が遷移しませんでした。そこで二色から四色に増やすことで色がきれいに遷移できないかと考え、Scriptを作成しました。
Script
作成したScriptは以下の通りです。hpが100%(color_1)~75%(color_2) 、75%(color_2)~25%(color_3) 、25%(color_3) ~0%(color_4) と場合分けし、ゲージの色を求めています。
using System.Collections;
using System.Collections.Generic;
using UnityEngine;
using UnityEngine.UI;

public class HPGaugeColorChange : MonoBehaviour
{

    public Color color_1, color_2, color_3, color_4;
    public float maxHP = 100;
    [Range(0, 100)]  public float hp = 100;
    private Image image_HPgauge;
    private float hp_ratio;

    // Start is called before the first frame update
    void Start()
    {
        image_HPgauge = gameObject.GetComponent();
    }

    // Update is called once per frame
    void Update()
    {
        hp_ratio = hp / maxHP;

        if (hp_ratio > 0.75f)
        {
            image_HPgauge.color = Color.Lerp(color_2, color_1, (hp_ratio - 0.75f) * 4f);
        }
        else if(hp_ratio > 0.25f)
        {
            image_HPgauge.color = Color.Lerp(color_3, color_2, (hp_ratio - 0.25f) * 4f);
        }
        else
        {
            image_HPgauge.color = Color.Lerp(color_4, color_3, hp_ratio * 4f);
        }

        image_HPgauge.fillAmount = hp_ratio;
    }
}
実行結果
実行結果は以下の通りです。hpがcolor_1にrgba(0,255,0,255)、color_2に rgba(255,255,0,255)、color_3に rgba(255,182,0,255)、color_4に rgba(255,0,0,255)としています。 先ほどの方法より、きれいに色が変化するようになりました。

HSVを使用する方法
色を表現する方法はrgb以外にもあります。HSVは 色相(Hue)、彩度(Saturation・Chroma)、明度(Value・Lightness・Brightness)によって色を表します。HSVにより、彩度と明度を変化させずに色相のみを変更することでゲージの色を変えます。
Script
Scriptは以下の通りです。 HSVtoRGBによってHSVからrgbへ変換しています。
using System.Collections;
using System.Collections.Generic;
using UnityEngine;
using UnityEngine.UI;

public class HPGaugeColorChange : MonoBehaviour
{

    public float maxHP = 100;
    [Range(0, 100)]  public float hp = 100;
    [Range(0, 1)] public float color_h,  color_s, color_v;
    private Image image_HPgauge;
    private float hp_ratio;

    // Start is called before the first frame update
    void Start()
    {
        image_HPgauge = gameObject.GetComponent();
        color_s = 1.0f;
        color_v = 1.0f;
    }

    Color HSVtoRGB(float h, float s, float v)
    {
        Color col = new Color(v, v, v, 1f);

        float c = v * s;
        float hd = h * 6.0f;
        float x = 1f - Mathf.Abs(hd % 2 - 1f);

        int i = (int)Mathf.Floor(hd);

        switch (i)
        {
            case 0:
                col.g *= 1f - s * (1f - x);
                col.b *= 1f - s;
                break;
            case 1:
                col.r *= 1f - s * (1f - x);
                col.b *= 1f - s;
                break;
            case 2:
                col.r *= 1f - s;
                col.b *= 1f - s * (1f - x);
                break;
            case 3:
                col.r *= 1f - s;
                col.g *= 1f - s * (1f - x);
                break;
            case 4:
                col.r *= 1f - s * (1f - x);
                col.g *= 1f - s;
                break;
            case 5:
                col.g *= 1f - s;
                col.b *= 1f - s * (1f - x);
                break;
            default:
                col.r = 1f - s;
                col.g = 1f - s;
                col.b = 1f - s;
                break;
        }
        return col;
    }

    // Update is called once per frame
    void Update()
    {
        hp_ratio = hp / maxHP;

        image_HPgauge.fillAmount = hp_ratio;
        color_h = Mathf.Lerp(0f, 0.4f, hp_ratio);

        image_HPgauge.color = HSVtoRGB(color_h, color_s, color_v);
    }
}
実行結果
実行結果は以下の通りです。色相を変更することで色が滑らかに変化していることがわかります。
HSLを使用する方法
HSLは色相(Hue)、彩度(Saturation)、輝度(Lightness/Luminance または Intensity)によって色を表します。 このHSVを使用し、彩度と輝度を変化させずに色相のみを変更することでゲージの色を変えます。
Script
Scriptは以下の通りです。 HSLtoRGBによってHSLからrgbへ変換しています。
using System.Collections;
using System.Collections.Generic;
using UnityEngine;
using UnityEngine.UI;

public class HPGaugeColorChange : MonoBehaviour
{

    public float maxHP = 100;
    [Range(0, 100)]  public float hp = 100;
    [Range(0, 1)] public float color_h,  color_s, color_l;
    private Image image_HPgauge;
    private float hp_ratio;

    // Start is called before the first frame update
    void Start()
    {
        image_HPgauge = gameObject.GetComponent();
        color_s = 1.0f;
        color_l = 0.5f;
    }

    Color HSLtoRGB(float H, float S, float L)
    {
        Color col = new Color(1f, 1f, 1f, 1f);

        float max = L + S * (1 - Mathf.Abs(2f * L - 1f)) * 0.5f;
        float min = L - S * (1 - Mathf.Abs(2f * L - 1f)) * 0.5f;

        int i = (int)Mathf.Floor(6.0f * H);

        switch (i)
        {
            case 0:
                col.r = max;
                col.g = min + (max - min) * 6.0f * H;
                col.b = min;
                break;
            case 1:
                col.r = min + (max - min) * (2.0f - 6.0f * H);
                col.g = max;
                col.b = min;
                break;
            case 2:
                col.r = min;
                col.g = max;
                col.b = min + (max - min) * (6.0f * H - 2.0f);
                break;
            case 3:
                col.r = min;
                col.g = min + (max - min) * (4.0f - 6.0f * H);
                col.b = max;
                break;
            case 4:
                col.r = min + (max - min) * (6.0f * H - 4.0f);
                col.g = min;
                col.b = max;
                break;
            case 5:
                col.r = max;
                col.g = min;
                col.b = min + (max - min) * (6.0f - 6.0f * H);
                break;
            default:
                col.r = max;
                col.g = max;
                col.b = max;
                break;
        }
        return col;
    }

    // Update is called once per frame
    void Update()
    {
        hp_ratio = hp / maxHP;

        image_HPgauge.fillAmount = hp_ratio;
        color_h = Mathf.Lerp(0f, 0.4f, hp_ratio);

        image_HPgauge.color = HSLtoRGB(color_h, color_s, color_l);
    }
}
実行結果
実行結果は以下の通りです。HSVと同様に色相を変更することで色が滑らかに変化していることがわかります。

参考サイト
-
前の記事
シェーダでノイズ3(セルノイズ) 2019.03.03
-
次の記事

素材追加(2019/3/29更新) 2019.03.29